
Hey there, kitchen maestros and culinary wizards!
Today, we’re diving into a perplexing predicament bugging many of you as you whip up your delicious concoctions in the kitchen.
Picture this: you’re on a roll, getting ready to create a masterpiece using your trusty stand mixer, and suddenly, you notice a little surprise at the base – a puddle of oil, as if your mixer decided to get in on the greasy action too!
Well, fear not, because we’ve got your back like a reliable sous chef.
We’re here to unravel the mystery of why your beloved stand mixer seems to be going through an “oil spill” phase.
Leaking oil can indeed be a sticky situation, but don’t worry, we’ll tackle this issue like a pro.
Now, you might be wondering, why should I bother understanding the nitty-gritty of this oily mess?
Oh, let me tell you!
Knowing the root causes and having some tricks up your chef’s sleeve to fix it can save you from unwanted kitchen drama and a whole lot of mess.
Just think about it – if you take care of your trusty mixer, it’ll return the favor by staying in tip-top shape, mixing away merrily for many culinary adventures to come.
Plus, by addressing this greasy dilemma, you’ll prolong its lifespan and prevent any further kitchen mishaps or damages.
So, if you’re ready to delve into the depths of the stand mixer universe and uncover the secrets behind its oily escapades, let’s roll up our sleeves and get mixing – both in the bowl and this article!
Grab your spatula, and let’s whip up some solutions together!
Why Does My Stand Mixer Leak Oil?
Your stand mixer may leak oil due to several reasons. Some common causes include overfilling of the oil reservoir, wear and tear from long-term usage, damaged gaskets or seals, and using the incorrect type of oil not recommended by the manufacturer.
Identifying the source of the oil leak can be done through visual inspection and troubleshooting. Regular maintenance and care, as well as using the right oil, can help prevent oil leakage and extend the lifespan of your stand mixer.
Seeking professional repair for more complex issues is also recommended.
Understanding Stand Mixers and Their Components
Alright, my fellow culinary adventurers, let’s start with a quick 101 on stand mixers.
Think of a stand mixer as your trusty sidekick in the kitchen, the Robin to your Batman, always ready to swoop in and save the day when it comes to mixing, kneading, and blending your favorite ingredients.
Now, what exactly is a stand mixer? Well, it’s like having a kitchen wizard with a powerful motor and a nifty set of attachments, all tucked neatly on your countertop.
No more tiring manual mixing, my friends! Just plop your ingredients into the mixing bowl, turn the dial to your desired speed, and let the magic unfold!
But before we get to the tricks of the trade, let’s peek under the hood and discover the essential components that make your stand mixer tick.
Some of these components are like silent heroes, working tirelessly behind the scenes to make your mixing experience smooth and hassle-free.
Pay attention, because here come the stars of the show!
First up, we have the heart of the operation – the motor. It’s the powerhouse that generates the energy to rotate those beaters and bring your batters to life.
Without it, your stand mixer might as well be taking a nap.
Next in line are the gears and pulleys, like the backstage crew, ensuring that all the magic happens at the right speed.
These guys work hand in hand with the motor to control the rotation and give you the freedom to mix at your desired pace.
Now, let’s talk about the mixing attachments – those trusty beaters and dough hooks that tirelessly do the heavy lifting for you.
They’re like the unsung heroes of the baking world, making sure your doughs are kneaded to perfection and your batters are smooth as silk.
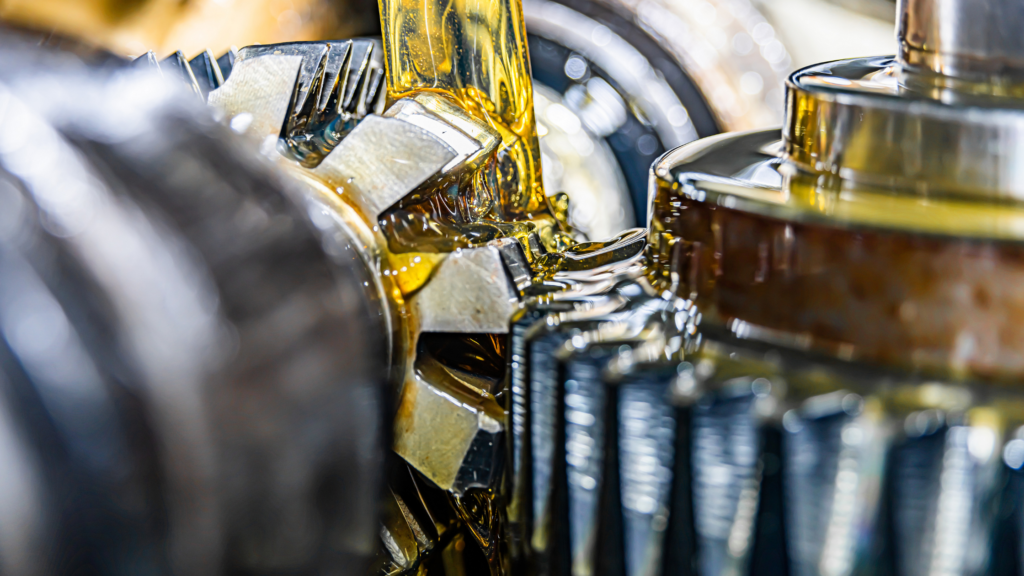
But, my friends, all this mixing marvel comes at a cost – friction and heat. That’s where our next hero steps in – lubrication.
Yep, just like how you oil the wheels of a bike for a smooth ride, stand mixers need their fair share of lubrication to keep things running like a well-oiled machine.
Lubrication is like the secret sauce that reduces wear and tear on those moving parts, ensuring they glide seamlessly together.
Without it, you’d end up with a cacophony of clunks and squeaks, and that’s the last thing you need when baking your masterpiece.
So, as you can see, lubrication is the unsung hero that keeps your stand mixer’s engine purring.
But hey, sometimes, even heroes can face challenges, and that’s when you might see a hint of oil making a daring escape from your trusty mixer.
But fret not! We’ll soon uncover the reasons behind this oily escapade and show you how to put a stop to it.
Stay tuned, my fellow kitchen connoisseurs, as we embark on a journey to unlock the mysteries of stand mixer oil leakage and come out victorious on the other side.
Until then, keep those spatulas ready and those mixing bowls ready! Let’s keep the culinary magic alive!
Common Causes of Stand Mixer Oil Leakage
Overfilling of Oil
Ah, the perils of overzealous oiling!
Now, my friends, let’s tackle the first culprit behind the sneaky oil leaks in your beloved stand mixer – the dreaded overfilling of the oil reservoir.
It’s like trying to pour your whole life story into a tiny book – it just won’t fit, and things are bound to get messy!
You see, your stand mixer comes with a designated oil reservoir, a special home for the lubricant that keeps everything running smoothly.
But here’s the deal – that reservoir has a limit, a threshold beyond which it says, “No more, please, I can’t take it!”
When you overfill the oil, you’re inviting trouble into your mixing paradise. That excess oil gets restless, trying to find a way out, and that’s when you’ll start spotting those suspicious puddles under your stand mixer.
Now, you might be wondering how to avoid this oily predicament, and it’s easier than measuring a cup of sugar! To maintain the perfect oil balance, all you need to do is follow a few simple steps.
First, locate the oil reservoir – it’s usually tucked away, out of sight, yet essential to your mixer’s smooth operation. Check your stand mixer’s manual, and it’ll gladly lead you to this hidden treasure.
Once you’ve found it, resist the urge to go overboard with the oil. Stick to the recommended levels like a seasoned chef follows a beloved recipe.
Keep your eye on that oil gauge and make sure you don’t cross the line!
But that’s not all, folks!
Every now and then, give your mixer some love by checking its oil levels.
Just like you’d pamper a pet with belly rubs, show your mixer some TLC by ensuring it has just the right amount of lubrication.
Now, I know you’re eager to whip up those delicious treats but trust me, taking a moment to check the oil levels is worth it.
You’ll save yourself from those pesky oil leaks and keep your stand mixer dancing merrily on your kitchen counter!
So, let’s raise our mixing bowls to the art of proper oiling – not too much, not too little, just the right amount to keep your stand mixer singing with joy!
Stay tuned, because we’re not done yet. More oily secrets are waiting to be unraveled, and we’ll be there, like kitchen detectives, to solve the case! Keep mixing, my friends!
Age and Wear
Ah, time, the sneaky little bandit that can’t resist leaving its mark on everything, even our beloved stand mixers.
You see, my dear kitchen enthusiasts, as your trusty mixer gets older, it’s bound to show signs of wear and tear, just like a well-used apron starts to lose its sparkle.
With every whisk, beat, and knead, your stand mixer’s internal components are working tirelessly, like a team of kitchen ninjas, to create culinary wonders.
But, like any devoted ninja, they too can experience some battle scars over time.
Now, don’t fret! It’s completely normal for your mixer to show some signs of age. After all, it has been your loyal companion through countless baking escapades and tasty experiments.
But here’s the catch – as those components wear down, they might start to protest, and that’s when you might notice a little oil seeping out from the cracks.
But fear not, for we have a weapon to combat this villainous wear and tear – the mighty power of regular maintenance!
Just like you’d oil the wheels of your car or polish your favorite chef’s knife, your stand mixer also deserves some love and attention.
Think of it as a spa day for your mixer – a chance to pamper it and keep it in tip-top shape. Regularly inspect those essential components, tighten any loose nuts and bolts, and give it a good clean to wipe away any excess grime.
And remember, when you spot signs of wear and tear, don’t hesitate to bring in reinforcements. Seek out those replacement parts like a treasure hunt, and your mixer will be forever grateful.
By staying vigilant and showing your stand mixer some tender loving care, you’ll not only keep those oil leaks at bay but also ensure your kitchen sidekick remains in top form, ready to whip up culinary wonders for years to come!
So, my mixing magicians, let’s make a pact to embrace the passage of time, knowing that with a little maintenance magic, we can keep our trusty mixers going strong.
Age may leave its marks, but we’ll turn those battle scars into badges of honor, showing off our culinary prowess with every delightful creation.
Keep mixing and stay tuned for more stand mixer revelations!
Damaged Gaskets or Seals
Ah, gaskets and seals, the unsung heroes of the oil leakage battle!
These little wonders may be tiny, but their job is colossal – to keep that precious oil contained within the heart of your stand mixer, just like a fortress protecting its treasures.
You see, dear culinary enthusiasts, gaskets and seals are like the invisible shields that prevent oil from seeping out and causing those pesky puddles on your countertop.
They form a tight barrier between moving parts, ensuring that your mixer’s internal magic stays where it belongs.
But, like any hero, gaskets and seals can’t stay invincible forever. Over time, they might face some tough challenges – a little crack here, a small tear there, and suddenly, the oil starts to slip through the cracks.
So, how do we keep these brave defenders in top form? Simple! Regularly inspecting them is the secret sauce to success.
Just as you’d give your mixing bowl a quick glance before starting a recipe, take a moment to examine those gaskets and seals.
Look for any signs of wear and tear, like a detective searching for clues. If you spot any damage or suspect they might not be doing their job as guardians of the oil, fear not! Replacing them is as easy as flipping a pancake.
Now, you might be wondering, “How do I do that?” Well, it’s easier than whisking up a fluffy meringue!
First, consult your trusty mixer manual – it’s like a treasure map, leading you to the location of those gaskets and seals.
Next, arm yourself with the appropriate replacement parts, just like a knight prepares for battle with the right armor.
Carefully remove the old, worn-out defenders and gently install the fresh, new ones in their rightful place.
And there you have it, folks! With a little inspection and a touch of replacement magic, your gaskets and seals will once again stand tall, ready to protect your mixer from any oily invaders.
So, as you mix and mingle in your kitchen kingdom, remember the importance of these small but mighty heroes.
Keep them in check, and they’ll keep those oil leaks at bay, ensuring your stand mixer continues to be the true champion of your culinary adventures!
Onward to kitchen glory!
Incorrect Type of Oil
Ah, the oil conundrum!
It might seem like a minor detail, but choosing the right oil for your stand mixer is like picking the perfect ingredient for a delicious recipe.
Use the wrong one, and you might end up with a not-so-tasty surprise!
Let’s get one thing straight – your mixer’s manufacturer knows it inside out, just like a master chef knows their signature dish.
They’ve carefully crafted their recommended oil like a secret sauce, tailor-made to keep your mixer humming along with delight.
You see, each stand mixer is a unique culinary beast, designed to handle specific tasks and challenges.
Using the wrong oil is like trying to fit a square peg into a round hole – it just won’t work out, and things might get a little messy!
So, here’s the golden rule – always follow the manufacturer’s guidance when it comes to oil selection.
Trust me, they’ve done their homework, testing, and retesting to find that perfect match for your mixer’s inner workings.
Now, you might wonder, “What’s the worst that could happen if I don’t use the right oil?” Well, hold onto your mixing spoons, because here come the potential consequences!
First off, using the wrong oil can throw off the delicate balance of your mixer’s components.
It’s like inviting an uninvited guest to a dinner party – things might get awkward, and your mixer might start experiencing some mysterious hiccups.
Secondly, the wrong oil might not provide the proper lubrication your mixer needs, like trying to fry an egg without any butter or oil in the pan – it just won’t sizzle and slide like it should!
And let’s not forget the long-term repercussions. Using an unsuitable oil might lead to premature wear and tear, like wearing your favorite shoes on a rocky hike – they won’t last long, and you’ll be left with aching feet and a broken heart.
So, my kitchen aficionados, heed this advice like a prized recipe from a Michelin-starred chef – always stick to the manufacturer’s recommended oil.
It’s the key to a harmonious relationship between your mixer’s moving parts, ensuring they dance in sync, and creating culinary masterpieces with each spin.
Remember, the right oil is like the secret ingredient to kitchen success. So, let’s make a pact to treat our stand mixers with the respect they deserve, using the proper oil to keep them mixing and mingling happily in our culinary adventures.
How to Diagnose Stand Mixer Oil Leakage
Ah, my kitchen sleuths, it’s time to put on our detective hats and solve the case of the elusive stand mixer oil leak! Like Sherlock Holmes with a mixing spoon, we’re on a mission to uncover the source of this greasy mystery.
Step one, my mixing maestros, is all about keen observation. Just like a hawk eyeing its prey from afar, we need to watch out for visual cues that might give us a clue.
Start by giving your mixer a thorough once-over. Check for any telltale signs of oil around the base, seams, or any suspicious nooks and crannies.
Remember, the culprit might be hiding in plain sight, just waiting for you to discover its oily tracks.
But don’t stop there! Let’s dig deeper into the mix. Peek under the hood and inspect those crucial components we discussed earlier – the motor, gears, and mixing attachments.
Like a mechanic inspecting a car engine, look for any signs of oil residue or dampness.
And here comes the secret weapon, my kitchen detectives – touch! Yes, get your hands in there and feel around for any greasy surprises.
Like a blindfolded taste test, your fingers might lead you to the source of the leak.
Once you’ve gathered all the evidence, it’s time to play detective and troubleshoot like a pro. One by one, assess the potential culprits.
Is it a loose bolt? A damaged seal? Or perhaps, the oil levels are feeling a bit overwhelmed?
But wait, my mixing magicians, don’t jump to conclusions just yet! Sometimes, what seems like an oil leak might be a sneaky red herring.
Check for any spilled ingredients or splatters from your previous mixing adventures, just like you’d clean up flour dust after a baking extravaganza.
And don’t forget to double-check your oil levels – it might be a simple case of overfilling, just like squeezing too much frosting on a cupcake.
By diligently following this step-by-step guide and utilizing the power of observation and deduction, you’ll become a true stand mixer detective, ready to solve any oily enigma that comes your way.
So, my mixing maestros, put on your detective hats, grab your magnifying glass (or a mixing spoon, if you prefer), and let’s embark on this thrilling oil leak investigation!
Resolving Stand Mixer Oil Leakage
Alright, my DIY kitchen wizards, it’s time to unleash your inner handyman and conquer those pesky oil leaks like true mixing masters!
Don’t fret, because we’ve got some nifty DIY solutions up our sleeves that will have your stand mixer leak-free in no time!
Fixing Minor Oil Leaks at Home:
a) Tighten Loose Bolts: Like a wobbly table needing some tightening, your stand mixer might just need a little love in the form of a screwdriver. Carefully inspect all the visible bolts and gently tighten any that seem loose. But remember, don’t overdo it – just enough to give your mixer that firm grip it needs.
b) Replace Damaged Gaskets or Seals: Remember those brave guardians, the gaskets and seals? If you suspect they’re the culprits behind the oil leak, it’s time to bring in the reinforcements. Purchase the appropriate replacement gaskets or seals (consult your mixer manual for the right ones), and with a gentle hand, remove the old and install the new. Voilà, your mixer will thank you with a grease-free hug!
c) Check Oil Levels: Ah, the golden rule of oiling – always maintain those levels just right! If you’ve been a bit generous with the oil, it’s time to give your mixer a little sip – remove any excess oil and get those levels back on track.
Necessary Tools and Materials:
a) Screwdriver: A trusty one will do the trick for tightening loose bolts.
b) Replacement Gaskets or Seals: Make sure you’ve got the right ones, like finding the perfect size for your favorite cookie cutter.
c) Cleaning Supplies: A gentle cleaning cloth or some paper towels to wipe away any excess oil and grime.
d) Kitchen Love: Last but not least, a sprinkle of patience and a dash of love. Remember, your stand mixer is like family, so treat it with the care it deserves!
With these easy-to-follow instructions and a few simple tools, you’ll be well-equipped to tackle those minor oil leaks like a seasoned kitchen repair pro.
Just remember, my DIY champions, if you ever feel overwhelmed or unsure, don’t hesitate to call in the reinforcements – a professional repair expert will be more than happy to lend a hand.
So, let’s roll up those sleeves, put on our DIY capes, and get ready to rescue our beloved stand mixers from the clutches of those oily leaks!
Professional Repair Options
Ah, there comes a time when even the bravest of DIY warriors must admit defeat and call in the cavalry – the professional repair experts!
When those oil leaks take a more complex turn, it’s perfectly alright to wave the white mixing spoon and seek the guidance of those with specialized knowledge.
So, if you find yourself facing an oily riddle that’s beyond your DIY skills, don’t worry! Calling in the pros is like having a master chef whip up a five-star meal – they’ll handle it with finesse and expertise.
Here are a few reasons why seeking professional help can save the day:
- Specialized Knowledge: These repair experts are like the Jedi masters of stand mixers, having trained and mastered the art of fixing all kinds of issues. They know those mixers inside and out, like the back of their seasoned cooking spatulas. Their knowledge runs deep, and they’ll quickly diagnose and pinpoint the source of those pesky oil leaks.
- Proper Tools and Equipment: Just as you’d use a chef’s knife to slice and dice with precision, professional repairers come armed with the proper tools and equipment. They won’t settle for makeshift fixes, ensuring that your stand mixer receives top-notch treatment, leaving it running smoother than ever.
- Time-Saving: Handing the job to the experts is like having a magical kitchen timer – it saves you precious time and energy. While they work their magic on your mixer, you can focus on honing your culinary skills, exploring new recipes, and creating kitchen delights.
- Long-Term Solutions: These pros are all about ensuring your stand mixer’s longevity. They’ll fix the root cause of the oil leak, preventing future mishaps, and keeping your mixer in tiptop shape for countless culinary escapades to come.
Remember, my mixing maestros, there’s no shame in seeking help when the going gets tough. Sometimes, even the most skilled bakers need a little support to perfect their recipes.
So, don’t hesitate to reach out to those professional repair wizards and let them work their magic on your stand mixer.
With their expertise and your love for culinary adventures, you’ll have a mixer that’s ready to tackle any mixing challenge, leaving those oil leaks in the past.
So, fear not, my kitchen companions, and embrace the power of professional help!
Preventive Maintenance and Care
Ah, my kitchen caretakers, it’s time to don your aprons and become the guardians of your stand mixers!
Just as seasoned chef takes care of their prized kitchen tools, we too must shower our mixers with love and attention to keep those oil leaks at bay.
Regular Maintenance:
Picture this – regular maintenance is like a secret recipe for preventing oil leakage and ensuring your mixer stays in tip-top shape. Make it a kitchen ritual, like your Sunday brunch or that much-anticipated baking day.
Keep those gears greased and bolts snug with routine inspections. Just like a gardener tending to their plants, give your mixer a gentle cleaning and check its oil levels regularly.
It’s a small effort that yields big results, saving you from those greasy surprises.
Checklist for Top Condition:
- Tighten Bolts and Nuts: Just like seasoning your favorite dish to perfection, make sure all those bolts and nuts are securely tightened. A little twist here and there will keep everything in place.
- Check and Replace Gaskets and Seals: Those brave defenders need a little TLC too! Inspect those gaskets and seals regularly, and if you spot any wear and tear, don’t hesitate to replace them.
- Clean with Care: Treat your mixer to a spa day by cleaning it gently but thoroughly. Wipe away any spills, splatters, and excess oil, making sure your mixer sparkles like a culinary gem.
- Maintain Oil Levels: Ah, the heart of preventive maintenance! Keep your eyes on those oil levels, just like a watchful guardian. Don’t overfill or underfill, and your mixer will dance in gratitude.
Tips for Extended Lifespan:
- Mind the Load: Like a weightlifter with a balanced workout routine, don’t overload your mixer. Follow the manufacturer’s guidelines for maximum capacity, and your mixer will last longer without strain.
- Gradual Speeds: My mixing magicians, avoid going from 0 to turbo in a split second. Gradually increase the speed, allowing your mixer to ease into the mixing frenzy without shocks.
- Rest Intervals: Just like a professional athlete needs rest between matches, give your mixer a break when tackling heavy mixes. Extended sessions can cause overheating, so let it cool down like a champ.
- Storage Savvy: When not in use, cover your mixer by tucking it into a cozy blanket. Protect it from dust and moisture, ensuring it’s ready for action when you’re in the mood to bake up a storm.
By following this preventive maintenance and care guide, you’ll become the master of mixer longevity, preventing oil leaks and keeping your kitchen sidekick mixing joyfully for many culinary endeavors ahead.
So, my kitchen guardians, let’s take charge and bestow our stand mixers with the love and care they deserve.
Embrace the power of maintenance, and you’ll reap the rewards of a grease-free, leak-free mixing paradise!
Ah, my kitchen troubleshooters, we’re not done yet! Stand mixers, like any kitchen superheroes, might occasionally face a few challenges along their culinary journey.
But worry not, because we’ve got the solutions to keep your mixer’s cape flying high!
Stand Mixer Issues
Common Stand Mixer Issues:
- Unusual Noises: If your mixer suddenly starts sounding like a kitchen concert, it might be trying to tell you something. The cause could be loose attachments, gears, or even a misaligned motor. Fear not, my kitchen conductors, just tighten those bolts and attachments, and your mixer will hum like a harmonious choir.
- Overheating: Like a runner pushing too hard, an overheated mixer can be a sign of an ambitious mixing session. Give it a breather, let it cool down, and next time, mix in shorter intervals to avoid this hot mess.
- Uneven Mixing: Are your batters lumpy and uneven? Fear not, it might just be a case of improper beater height or an uneven mixing bowl. Adjust those beaters and ensure your bowl is level for that smooth mixing symphony.
Causes and Possible Solutions:
- Unusual Noises: Loose attachments and gears can lead to clunks and clanks. Simply tighten them up, and your mixer will sound harmonious again. If the noise persists, it might be worth consulting a professional to check for any deeper issues.
- Overheating: Mixing heavy loads for extended periods can cause your mixer to heat up like a baking oven. Give it short breaks in between and avoid overloading, and you’ll keep the temperature in check.
- Uneven Mixing: Inconsistent batters might be a result of improper beater height or a wobbly mixing bowl. Adjust the beater height, and ensure your bowl is level and secure, and you’ll see those lumps vanish.
Remember, my mixing magicians, every challenge comes with its own solution. Keep an eye out for these common issues, and with a little troubleshooting magic, you’ll have your mixer back in its full culinary glory.
So, fear not the occasional hiccup in your mixing adventures! Armed with knowledge and a sprinkle of kitchen magic, you’ll conquer any mixer challenge that comes your way.
Onward to kitchen mastery! Happy troubleshooting and mixing!
Conclusion
And there you have it, my kitchen comrades – our grand finale, a culinary symphony of knowledge and tips to keep your stand mixers in top-notch shape!
Let’s recap our mixing adventures and set the stage for a future of leak-free delights.
Recap:
We started by uncovering the mysteries of stand mixer oil leakage and exploring the culprits behind those sneaky puddles.
We braved the challenges of overfilling, age, and wear, damaged gaskets, and using the wrong oil – all while gaining insights into the role of lubrication in your mixer’s smooth operation.
But fret not, my mixing maestros, for we played the role of stand mixer detectives, learning to diagnose those oil leaks with observation and troubleshooting prowess.
Armed with our DIY solutions and the power of professional help, we stood ready to conquer any oily challenge.
We then turned our attention to the art of preventive maintenance and care, becoming guardians of our mixers.
With regular inspections, a checklist for top condition, and tips for a longer lifespan, we embraced the path of culinary caretakers.
And finally, like a victorious chef after a well-executed meal, we triumphed over other common mixer issues, mastering the art of troubleshooting.
Encouragement:
Let this journey inspire you to take proactive measures in maintaining your stand mixers. Embrace the ritual of regular maintenance, and your mixer will repay you with endless mixing joy.
Let’s cherish those gaskets and seals, tighten those bolts, and keep that oil at its optimum levels.
Reiterating The Benefits:
By addressing oil leakage promptly, we’ve unlocked the secrets to keeping our mixers running like well-oiled machines.
Preventing those leaks not only prolongs the lifespan of our mixers but also ensures their smooth operation and keeps the magic of mixing alive.
So, dear culinary adventurers, take these lessons to heart and let your stand mixer become your loyal kitchen companion.
With knowledge and a dash of TLC, your mixer will be your partner in culinary creativity for many scrumptious delights to come.
Onward to a grease-free, leak-free mixing paradise, my kitchen comrades!
Happy mixing, maintaining, and troubleshooting!
May your culinary journey be filled with endless joy and delicious creations!
Bon appétit!